How to choose ventilation for a bath?
It would seem strange: in order to achieve a comfortable temperature, you have to insulate the room and warm it up, and then grab it and run cold street air into the protected warm bath! How to come up with a ventilation system in a bath, watch a special video? Perhaps the main thing is not to spoil its natural climate and maximize its service life without repair.
Do-it-yourself sauna ventilation
After all, everyone understands how important it is to maintain a certain humidity and temperature regime in their baths. But besides these fundamental parameters, there is one important condition, which directly depends on the health of visitors and the durability of the building itself - the ventilation of the bath. With your own hands, you can create the correct ventilation in the bath, and then it will serve you for more than a decade.
If you look at the consequences of negligence in the ventilation of the bath on the part of its owners, the following are the most common of them:
- The fragility of the operation of the bath... That is, its rapid wear. Wood, as the main building material for a bath, with poor ventilation, serves no more than 20 years. If the air flow is completely blocked, a complete replacement of the casing may be required after 5 years. Pay attention to how to properly ventilate the bath: video at the end of the article;
- Unpleasant stale smell... Since there is no fresh air in the steam room, the wood sheathing ages 2-3 times faster than with proper ventilation. The wood also instantly absorbs unpleasant odors, which will not beautify any bath. It will become more and more difficult to get rid of the smell over time, and it is strictly forbidden to use fragrances and aerosols;
- Harmful air... Decomposition products from human perspiration in the air evaporate and complement the atmosphere in the bath, and not in the best way. It is almost impossible to get a health-improving effect from rest in such a steam room;
- The appearance of fungi and mold... In rooms with high air humidity without periodic ventilation, sooner or later mold starts to grow on the ceiling and walls.
Ventilation in the bath: schemes
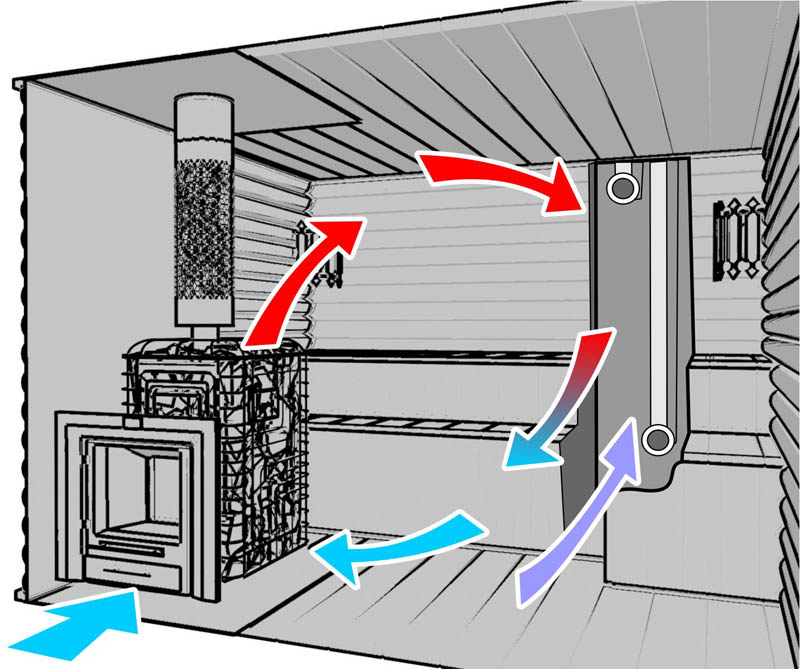
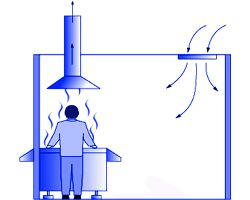
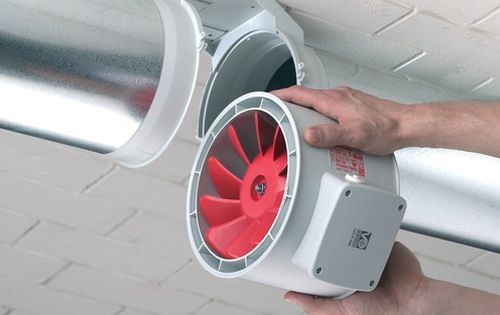
Scheme 1... The inflow hole is located behind the stove at a level of 0.5 m from the stove, while the hood is on the wall opposite the entrance in the lowest and closest position to the floor. The hood is forced with a fan inserted into the exhaust hole. This ventilation in the bath, the scheme of which is not so complicated, contributes to the uniform heating of the fresh air entering the room.
Scheme 2... Both the exhaust and inlet openings are located on a single wall opposite the stove: in the lower position, the entrance is at a level of 0.2 m from the floor, in the upper position, the outlet is located 0.3 m from the ceiling. The fan is used in the same way. Cold air flow, getting into the steam room, rests against the stove, heats up and goes up the room. Having made a circle in the steam room, it enters the exhaust hole and is removed.
Bath floor ventilation
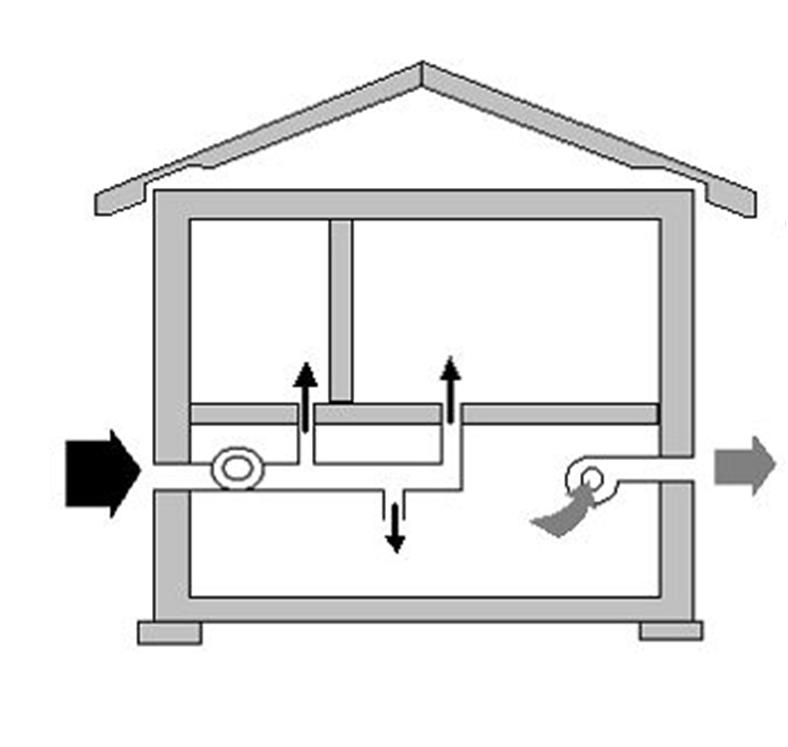
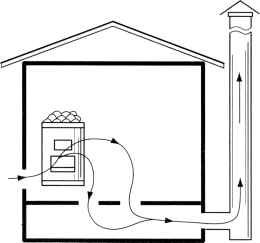
The option described below is ideal for a steam room with a "leaking" floor. In such a room, one inlet is provided behind the stove at a level of 0.3 meters above the floor. The spent cold air mass descends and goes out through the cracks, underground and a ventilation pipe directed to the roof.
Ventilation of the floor in the bath requires a special scheme, but it is able to improve the air exchange in the steam room in the best way, and also contributes to a really quick drying of the floor and an increase in its service life.