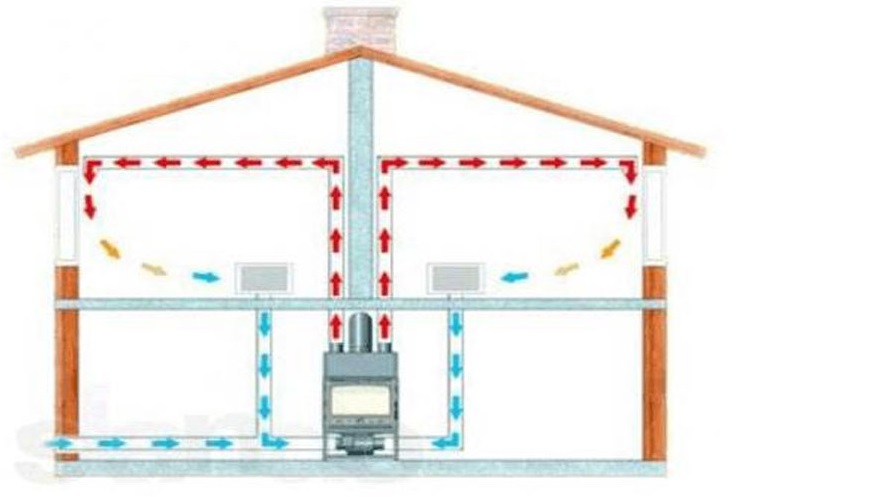
The classic stove distributes heat unevenly. One area of the house can stay warm, while the back room will be outside the temperature. The water circuit, which is installed in the oven, allows you to expand its capabilities. Thanks to the installed radiators, the boiler heats the entire area of the house, giving off maximum heat at minimum cost.
Embedding a boiler in a furnace is not a very time consuming process, the main thing is to understand how to do it correctly. You will need to create a heat exchanger (most often, this is a simple coil).
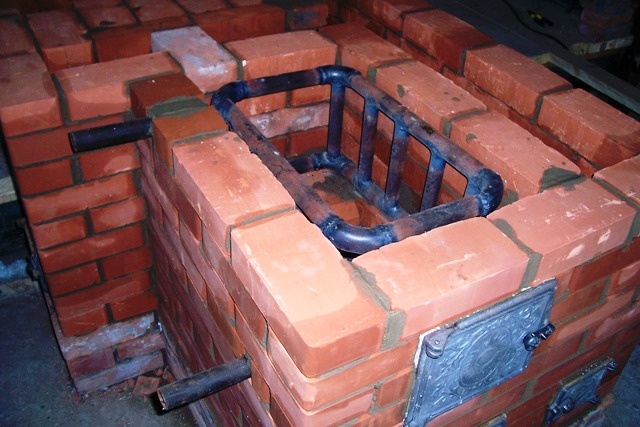
It is necessary to position the heat exchanger so that it does not interfere with the loading of fuel and its combustion in the furnace. A coil is made of pipes or metal plates (usually heat-resistant stainless steel is used).
What designs are:
- with natural circulation. The standard version is completely non-volatile. Water moves due to thermal expansion and an increase in water pressure. No pumps are required here. The water flow rises on its own, and then, under the influence of gravity, returns to the radiators. An open expansion tank is placed at the top point. This allows excess air to be removed from the piping system;
- with forced circulation. In this design, a pump is installed, with the help of which water moves through the pipeline. The pump is powered by electricity. Therefore, such a water boiler cannot function autonomously.
Pros and cons as opposed to a conventional oven
Advantages of a classic oven with a water boiler:
- saving space by reducing the size of the furnace. A conventional oven takes up a lot of space. But when installing a heat exchanger, the size of the fuel tank is important, not the furnace itself. This makes it possible to install more compact ovens;
- even distribution of heat throughout the house. This is difficult to achieve with a conventional oven. Most often, the warmth is felt only near the structure itself, but not in the distant rooms of the room. The installation of heat radiators and a heat exchanger will make it possible to make a small boiler room out of a bulky stove, which will heat the entire home space;
- saving time. The stove does not need to be heated. It is enough to add fuel in the morning and in the evening (as a last resort - once a day). This is enough to put the structure into action;
- increase in efficiency. In conventional ovens, the ratio is 50-60 percent. In furnaces with a heat exchanger - up to 85 percent.
And yet, such boilers have drawbacks. Constant adherence to fire safety techniques is required (as with other heating systems). Before kindling, install a barrier made of heat-resistant material.
The installation process itself requires certain professional skills. You can install such an oven on your own, but it is recommended to seek expert advice. Masonry is a delicate art that cannot be mastered in one day.
When erecting a furnace, an additional foundation will be required.
How to design and what to look for
- combustion products must leave the oven at a minimum temperature. The amount of heat given off by gases inside the furnace determines the efficiency of the structure;
- it is recommended to locate the heat exchanger outside the fuel tank, as the firebox is the hottest place in the furnace. Accordingly, the heat exchanger will take heat. In turn, this will reduce the efficiency of the furnace;
- the water flow in the heat exchanger must be directed in such a way that it flows towards the heat. This will provide more efficient heating by maintaining temperatures between media;
For the manufacture of a heat exchanger, it is best to use a heat-resistant stainless steel. You can also use a cheaper option: corrosion-resistant steel, but this will affect the quality of the structure.
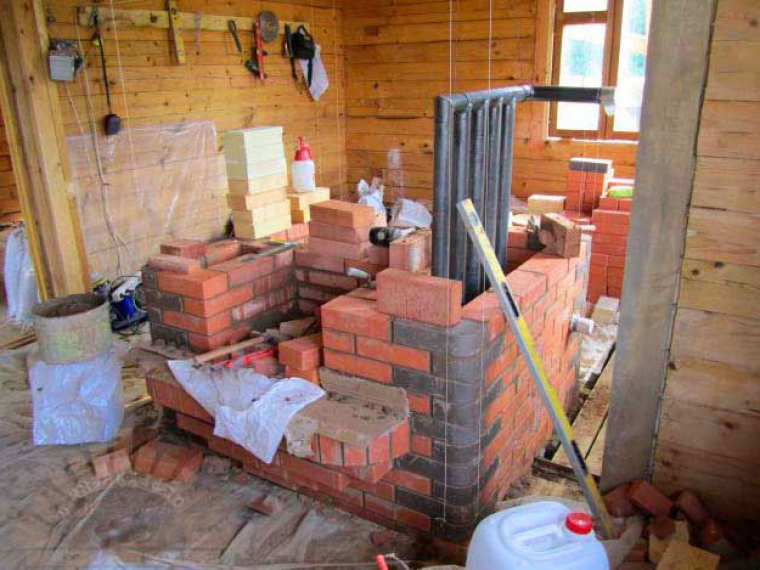
When the location of the furnace has been determined and the foundation has been laid, you can proceed with the ordering of the structure with the boiler. The order is a plan for installing bricks, which will determine where they should be located: a blower, a fuel tank, a cooking panel, a chimney, and so on.
You can find a detailed plan on the internet. Many specialists (and simply skilled stove-makers) post their diagrams and drawings for free access.
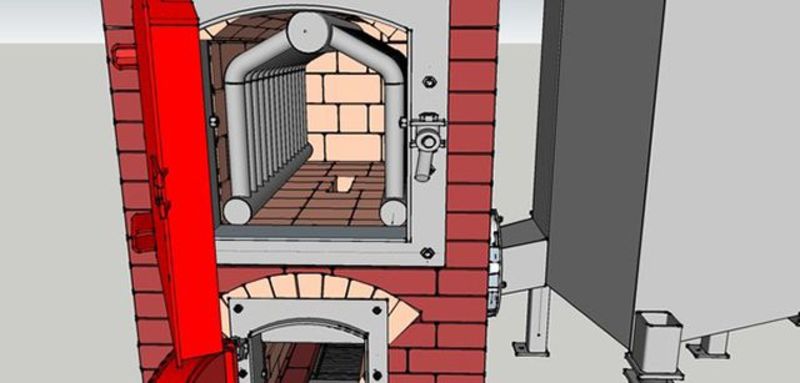
As an option - the installation of a bell-type chimney, with a heat exchanger placed in it, which is made in the form of a register (pipes welded into one large circuit).
Such a scheme will allow:
- retain gases from the oven in the bell;
- ensure uninterrupted combustion in the fuel tank;
- create natural circulation of heat.
Features of installation and further operation
- Prepare a mixture of water, clay and sand (you can buy a ready-made solution at the store).
- Seal the foundation with a waterproofing layer. Roofing material or any other protective material will do.
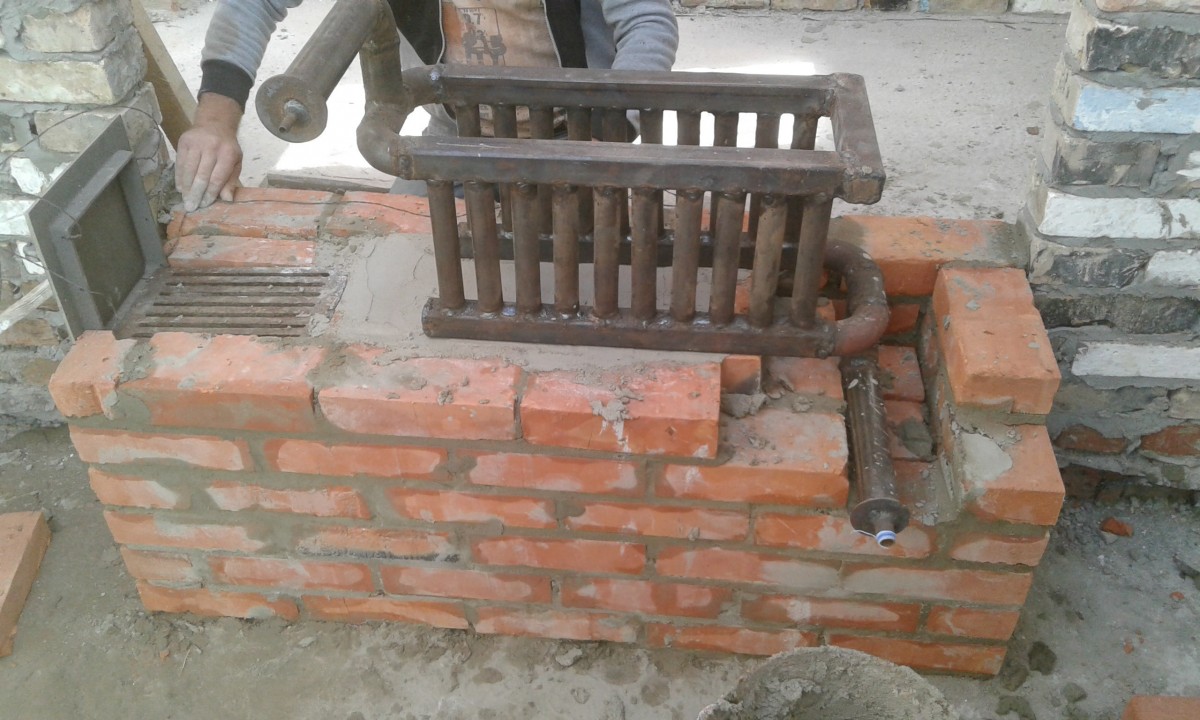
- Apply a previously prepared (or purchased) solution to the protective layer. Lay out the brick row. Then, following the order, erect the base of the stove. Install the coil.
- Lay out the kindling and ash compartment (following the outlined diagram).
- Secure the firebox door with wire. Then install the stove roof and chimney. Place bricks with rounded corners inside the combustion chamber so that soot does not accumulate there. This could lead to fire.
- As soon as you finish making the stove, proceed with the installation of the water boiler. Attach the circuit pipes to the heat exchanger by connecting them to the radiators. Install an expansion tank and fill the system with heating medium.
Now it remains to carry out finishing work. For the outer layer of the oven, plaster or tiles are used.
The advantage of the oven is its autonomy. You don't have to come up every hour and throw in new fuel. Enough one or two times a day: morning and evening. But you need to use the oven with a water circuit carefully. Remember to comply with fire safety regulations.
in your opinion a stove with a water circuit is more fire hazardous than without it? I wonder why