Storeroom - a utility room in a house or apartment where equipment, household items that are rarely used, inventory, etc. are stored. It is better to place things on shelves or brackets so as not to damage them. You can equip the shelves in the pantry with your own hands.
Benefits of pantry shelves
The advantages are obvious.
- The rules for storing things are followed.
- Items are placed in a specific order. This makes it easy to find any tool or product.
- The number of things that can be left in the pantry is noticeably increasing. After all, the total area of the shelves is much larger than the floor area in the room.
- On the bar racks, you can leave not only things, but also conservation, groceries, bulk products.
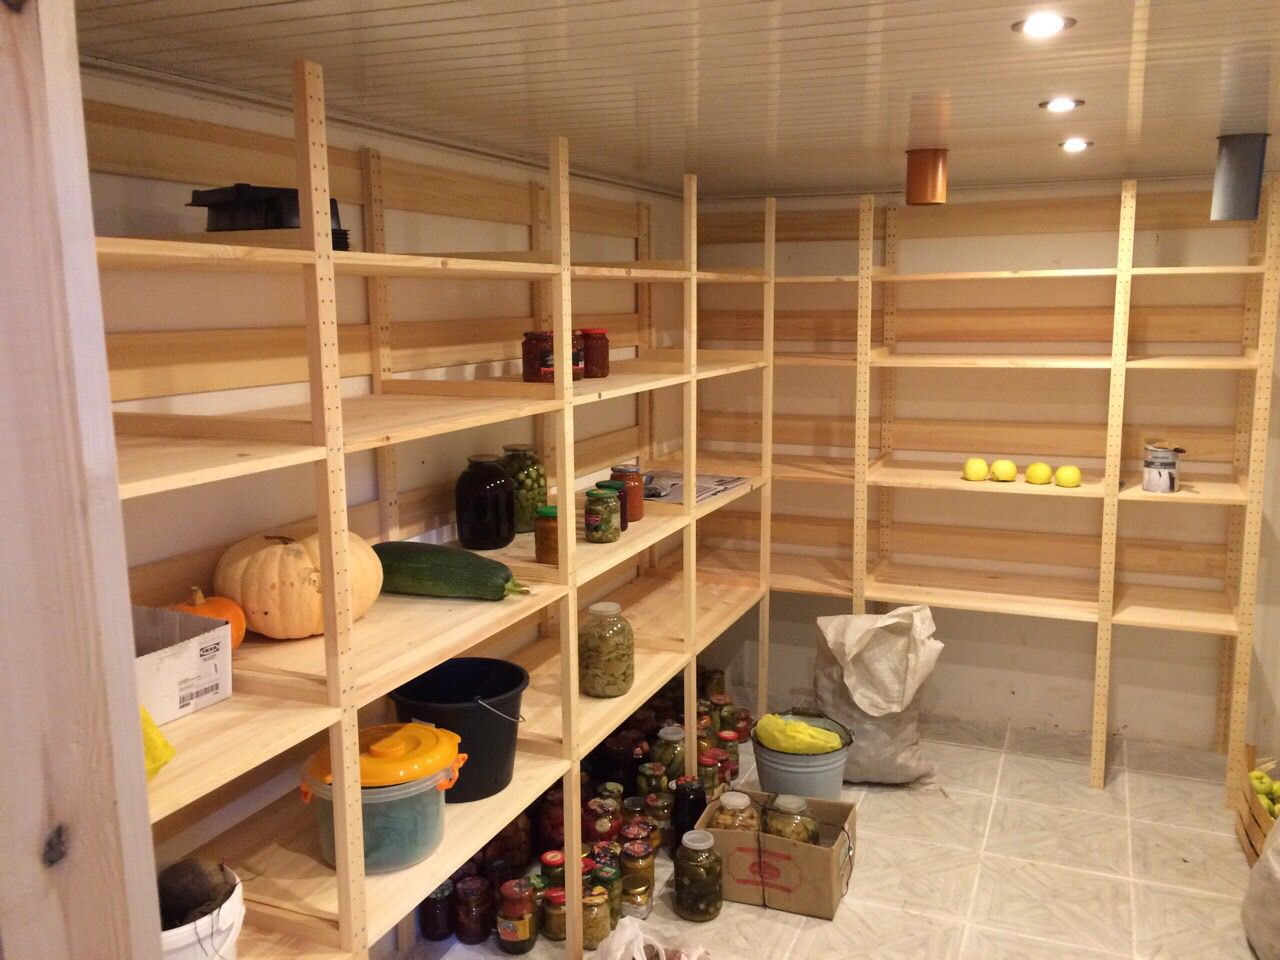
Shelves are used in many different types:
- open - that is, without side parts;
- closed - rarely glazed, but with sidewalls and a top;
- hinged - fixed to the wall on hooks or anchors;
- racks - a series of shelves placed on a frame.
The number and type of shelves depends on the purpose of the pantry. If a dressing room is equipped here, shelves for knitwear and shoes, as well as compartments with hangers are mounted. If they are going to hold sports equipment, hooks and brackets are added.
What material can be used

To make pantry shelves, it is wise to use materials that are affordable and quality.
- Boards - for furniture shelves, edged grooved boards with a smooth sanded surface are taken. The material is easy to process, affordable, extremely diverse. To store even heavy glass bottles with cucumbers, you can take soft wood: pine, poplar, apple. The ends of the shelves are sealed with an edge or rounded off.
- Furniture panels - usually used if there are fragments left, since it is unprofitable to buy such material for shelves.
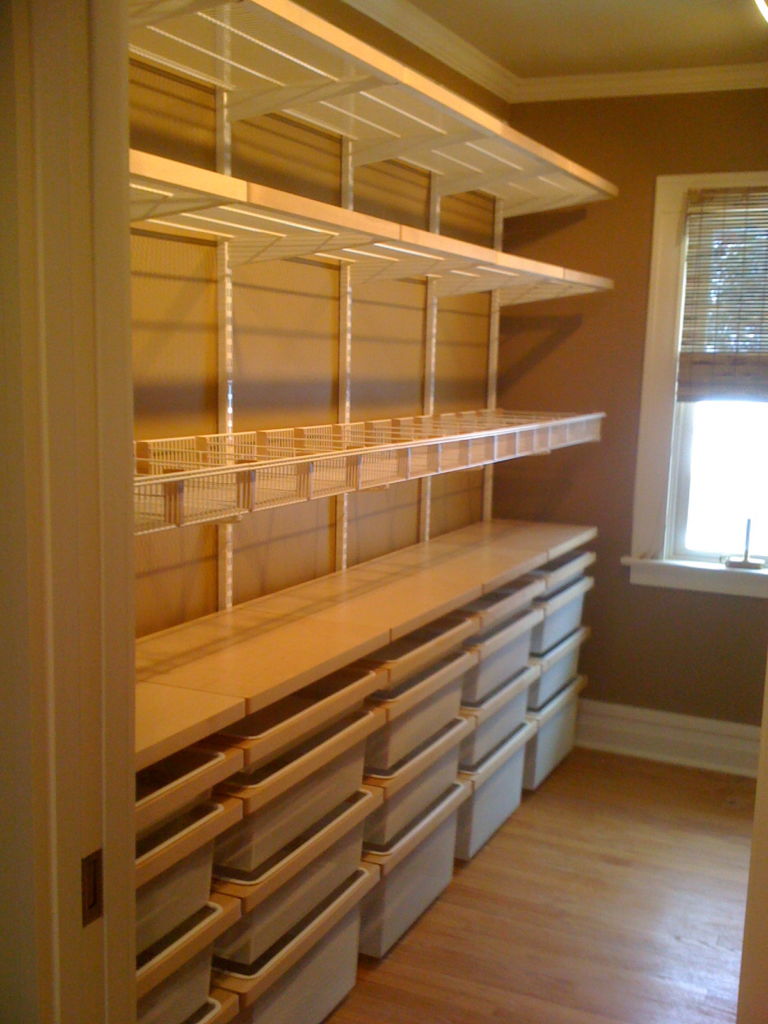
- Wood materials - plywood, MDF, chipboard. They are quite suitable if it is supposed to store relatively light items, household appliances, clothes here. However, only thick plywood is taken for pickles or heavy equipment - at least 3 cm.
- Metal profiles - steel alloys are characterized by high bearing capacity. Preservation shelves are made of galvanized iron with a thickness of 0.5 mm. A perforated sheet is preferable as it guarantees good air circulation.
Often, racks are made by combining wood materials and metal profiles. For example, a frame or support is made of metal, and the shelves themselves are made of plywood or boards.
How best to arrange the shelves in the pantry
Do-it-yourself racks from wood in the pantry are made taking into account the characteristics of the room and purpose. If household appliances are stored here, the dimensions will have to be modified and strengthened for them. If the pantry serves as a kind of kitchen cabinet, the lightest designs will do.
Choosing a place for a shelf
The placement of the shelves depends on the configuration of the room.
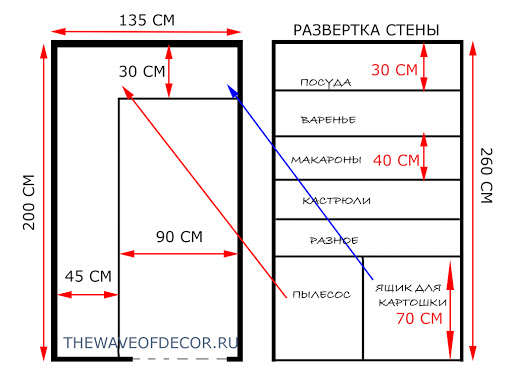
- Along 2 opposite walls - realized when the room has an elongated shape. It makes no sense to put shelves on a short wall. It is better to attach hooks or brackets here to hang heavy bulky objects.
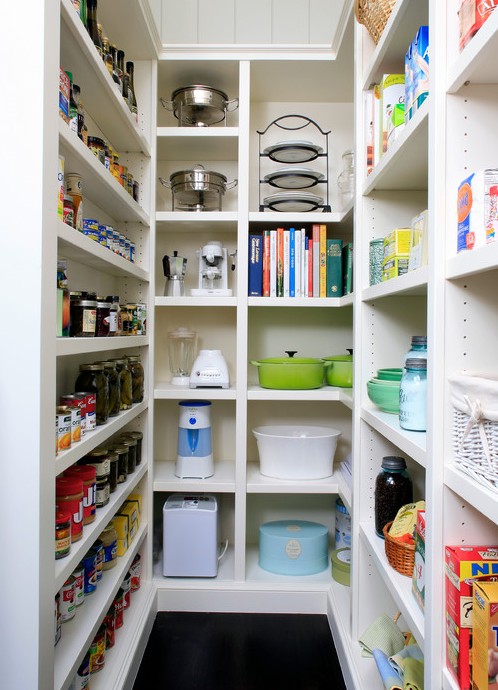
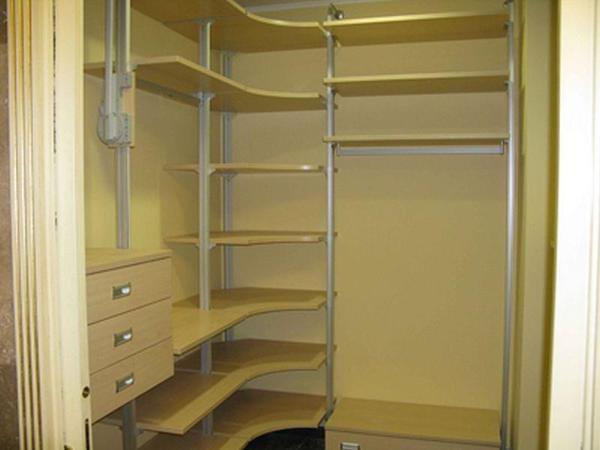
- L-shaped - suitable for a square or rectangular room.The angular configuration of open shelves does not affect their cost and convenience in any way. On the contrary, more voluminous objects can be installed in the corner.
- U-shaped - requires a fairly large area, since there must be a sufficient passage between the shelves. This configuration is preferred in the grocery and pickles pantry.
Above the doorway, you can install another shelf if the height of the room allows. Things that are rarely used are left here.
Distance between shelves and their dimensions
The dimensions of the furniture depend on what is supposed to be stored here. The recommendations are as follows.
- It makes no sense to make a shelf deeper than 50-60 cm. This is the average length of a human hand. If the shelf is deeper, it will be inconvenient and difficult to get items from the back row.
- The width of the shelves changes from bottom to top. The widest shelf is placed at the bottom, the narrowest at the top. This allows you to store the heaviest and largest items at the bottom, and place the lightest and smallest items at the top.
- The frequency of the baffles is often determined by the number of sections. This is more convenient: items of one purpose are placed in clearly visible sectors. Therefore, the partitions on different shelf levels do not have to be the same.
- Small open shelves of rounded shape on the side of the rack are allowed. Usually, little things are left here, which are often required.
In the closet-closet, ordinary shelves are supplemented with special compartments with accessories: folding nets, drawers, pull-out nets.
Shelves in a small pantry
In a small room, you need to rationally use every centimeter. The recommendations are as follows:
- preference is given to the corner configuration, since here even narrow shelves create more space;
- it is better to put hinged structures, and not a rack;
- closed compartments are not allowed;
- the shelves are mounted up to the ceiling.
To use the upper mezzanines, you need a ladder.
An unusual solution for a very small pantry or even a niche is the transformation of the entire room into one large wardrobe. In this case, the doorway is increased to the size of the room itself and drawers are installed along the entire height.
Tools for the job
To assemble the rack you will need:
- puncher and screwdriver;
- circular saw, hacksaw for metal or wood;
- planer, sandpaper;
- tape measure, building level and pencil.
For finishing, you may need a primer, varnish, paint.
DIY shelf options
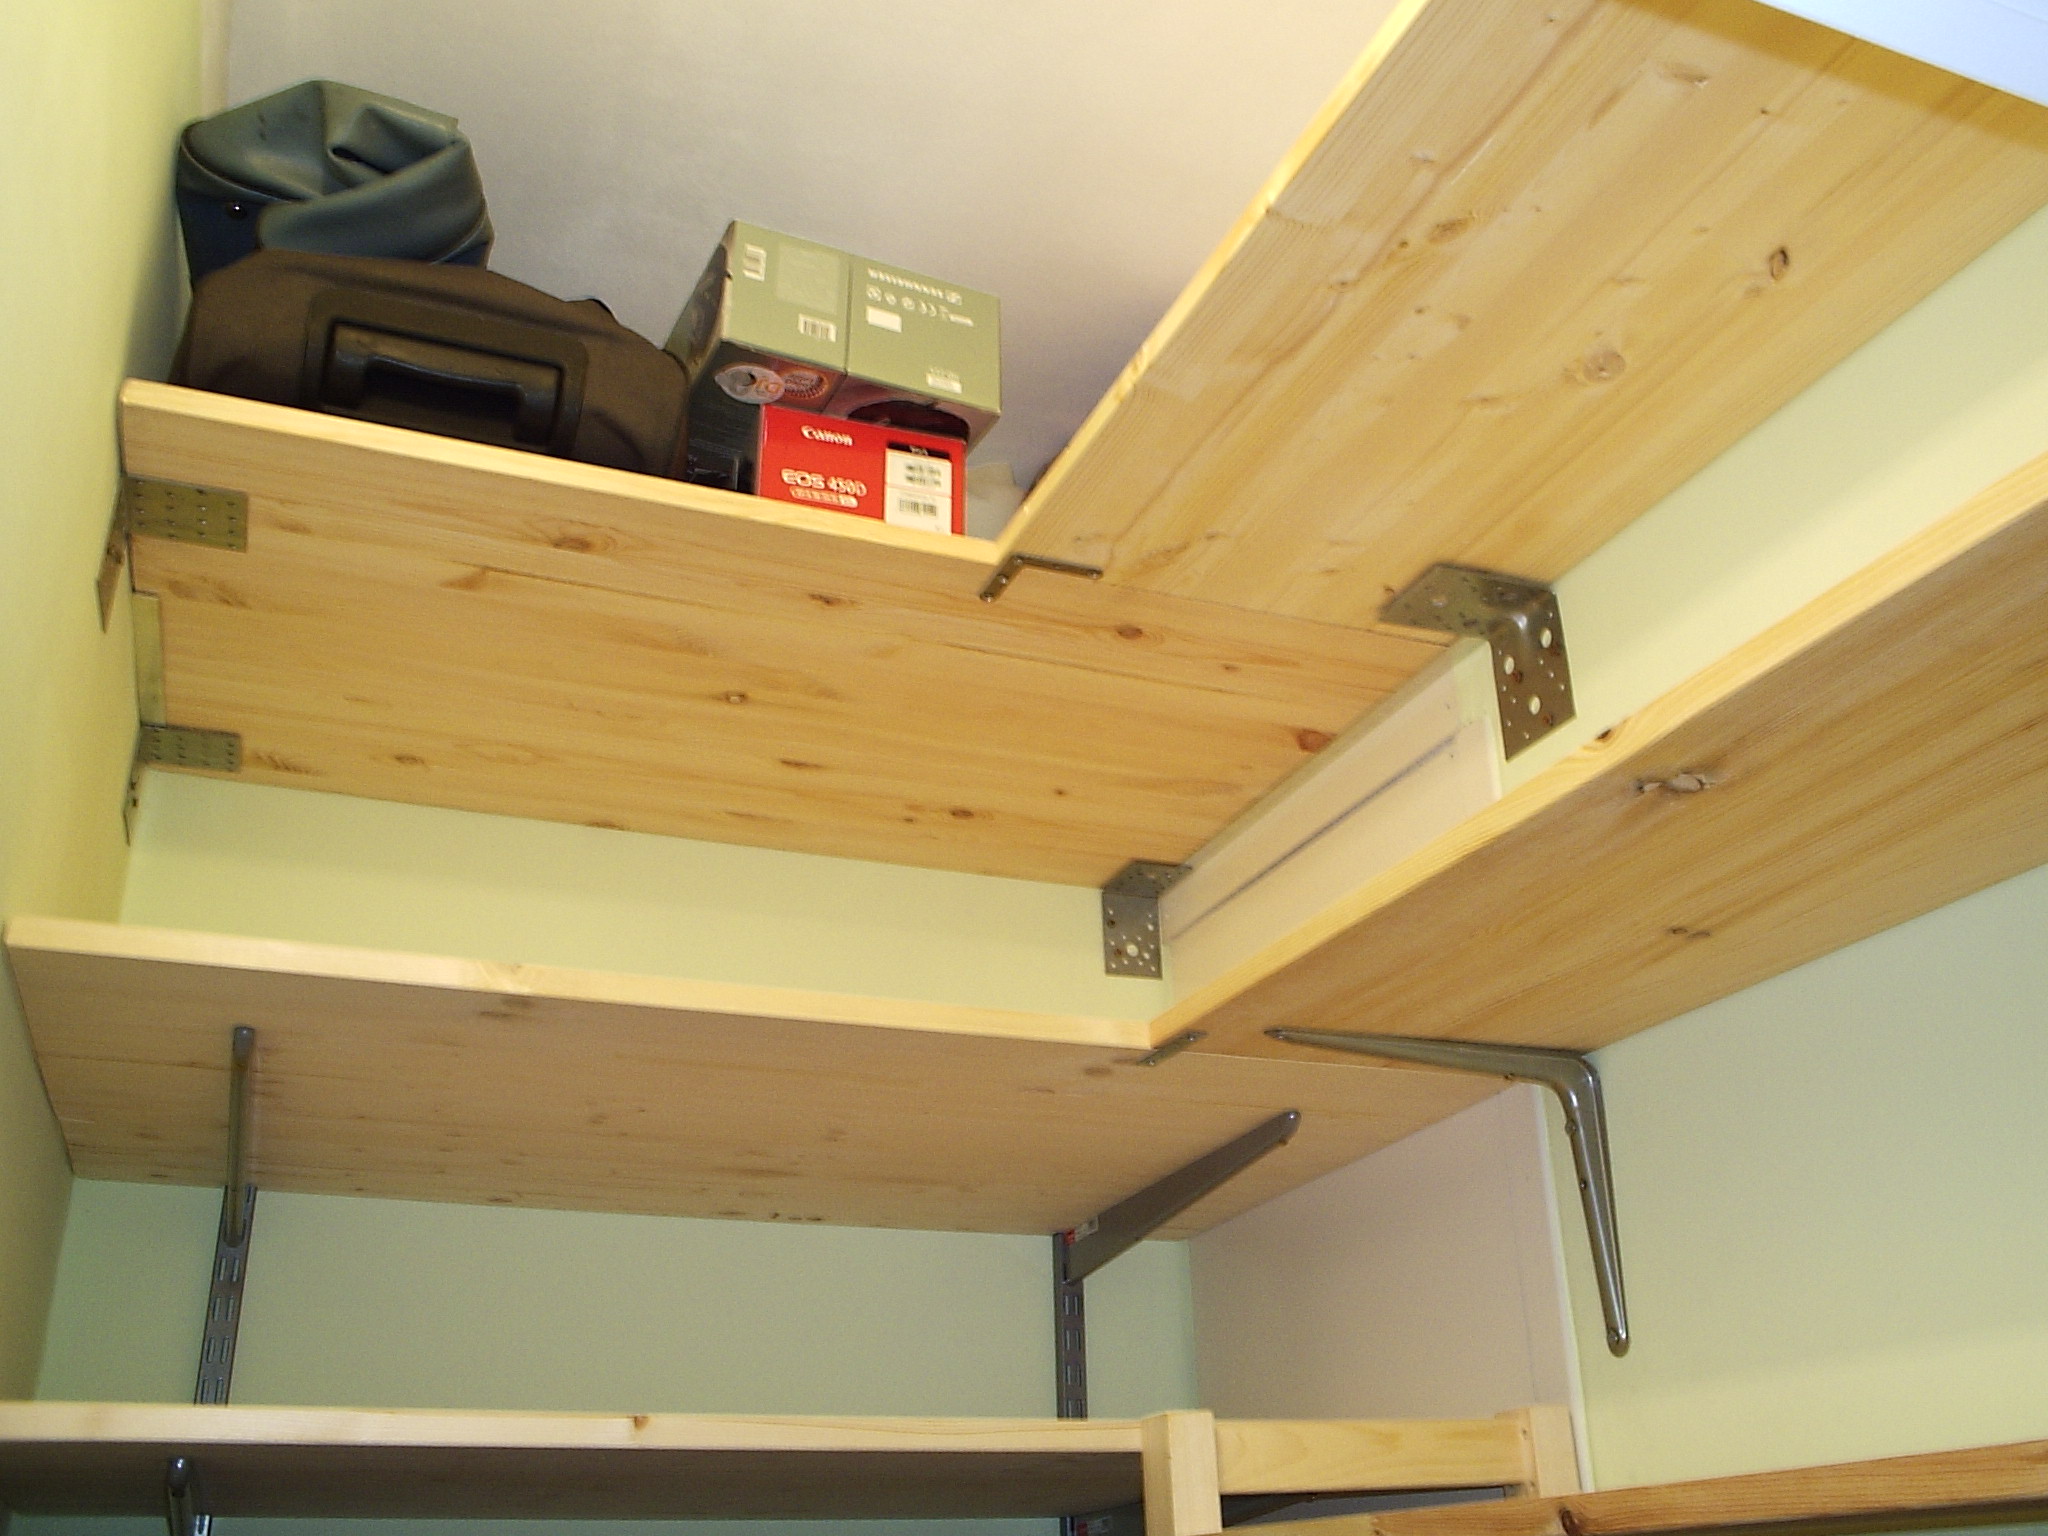
How and what kind of shelves to make in the pantry with your own hands is decided at the design stage. In most cases, furniture is attached to the wall here so that it can withstand a large load-bearing load. For each new fixing, it is necessary to drill a hole in the wall with a hammer drill and remount the entire wall.
Wooden shelving
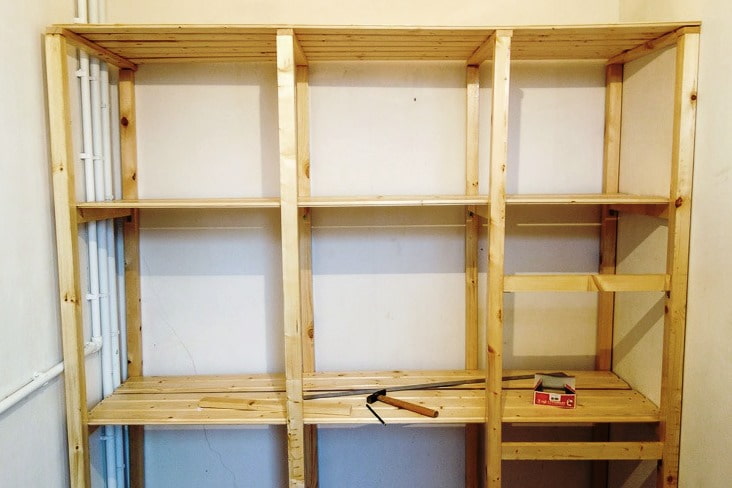
Do-it-yourself wooden rack for pantry can be with or without wall mounting. The first option is much more common. In the cabinet, the main bearing load is not on the shelves, but on the frame. If the rack is mounted on a wall, this load is absorbed by the wall.
The load in a model based on its own frame is determined by the characteristics of the frame itself. This means that for a storage rack, for example, you need to take a massive timber, which complicates assembly and increases the cost.
Installation instructions are simple.
- It is recommended to make a drawing. This makes it easier to take into account what exactly will be stored in the pantry and what dimensions should be on the shelves.
- With the help of a level and a pencil, they transfer the drawing to the walls.
- The timber is cut to the height of the uprights and fixed to the wall. Holes are drilled in the wall in advance for fasteners.
- At the place where the shelves are attached to the racks, short bars are fixed under the shelves - 30–40 cm long. Each bar is fastened with 2 or 3 self-tapping screws.
- Cut boards or plywood under the shelves. The material must be sanded, treated with a stain or primer.
- The shelves are laid on horizontal bars and fastened with 35–40 mm self-tapping screws.
If the rack is used for conservation, the shelves are strengthened by installing pieces of metal pipe under them.
Finished furniture can be varnished or painted.
Profile shelves
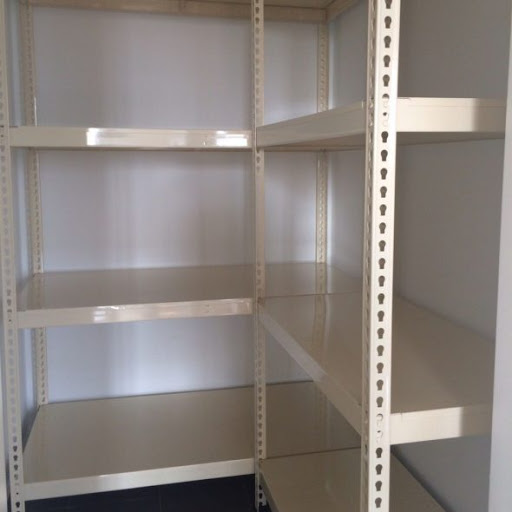
Using the same scheme, you can assemble a rack from a professional pipe or corner.
- Mark out the wall. Holes for fasteners are drilled according to the marks.
- The guide profile is fixed along the lines. Horizontal crossbars are inserted into it and screwed to the vertical posts and into the lower guide. It turns out a kind of frame into which you need to insert wooden blanks.
- Cut out shelves from chipboard, plywood, boards with a jigsaw. Sanding.
- The shelves are laid on the frame and fastened with self-tapping screws.
The lower shelf should not be lowered less than 50 cm from the floor. Otherwise, it is inconvenient to get objects from it.


