To save time on erecting basement walls, you can make a cellar of 2 m concrete rings.This option is suitable for a small plot of land or in the case when everything is already occupied by landings and other buildings (for example, a garage). Rings are not only round, but also square. Suitable dimensions of concrete products for arranging a basement are 2-2.5 m in diameter. When using smaller products, the room will turn out to be cramped, and large structures are difficult to lift.
The device and types of cellars made of concrete rings
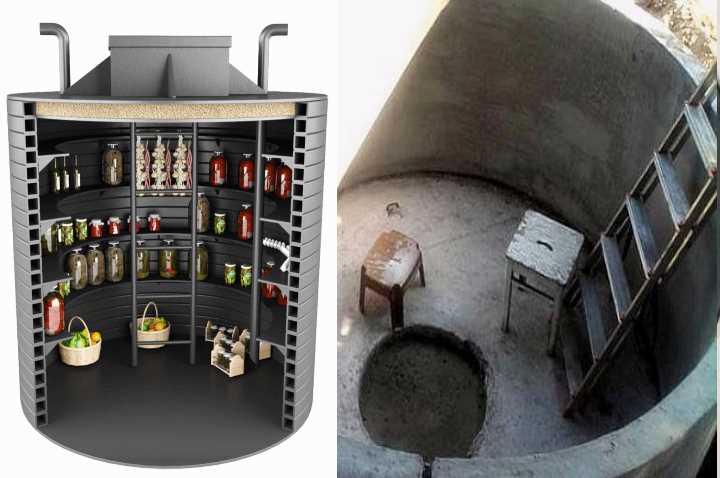
The ring cellar can be made horizontal or vertical. The first option requires significant labor costs and takes up more area, but is well suited for areas with high groundwater levels. A vertical cellar can be made with different depths.
The easiest option to organize with your own hands is a cellar made of reinforced concrete rings, which does not rise above the soil level. But it is suitable only for those areas where underground waters lie deeper than 2.5 m from the ground. For the construction, you need to buy at least two or three concrete rings. Before installation, they are coated on the outside with waterproofing mastic. The total number of items depends on their height. They should form a structure 30-40 cm higher than the height of the person using the basement. It is also important that the purchased products have locks: then it will be easier to seal the building.
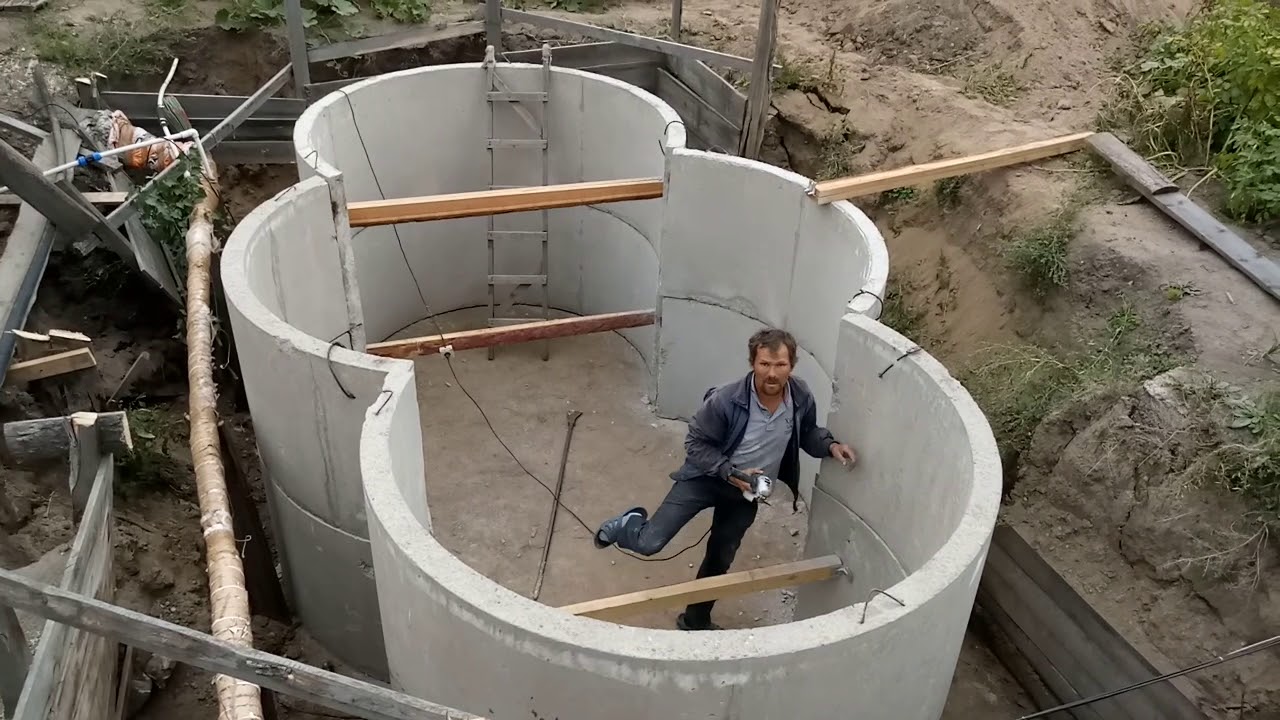
It is not difficult to make a buried vertical cellar: first, a hole is dug 2-2.5 m deep, then rings are installed in it one on top of the other. To do this, you can use a winch or a crane. The floor can be made of earthen or concrete. The safest option is to make a ring with a bottom as the bottom structural element. An earthen floor is suitable if the waters are deep.
If the underground currents are located high, a shallow vertical structure can be made. In this case, they stop digging the hole at a depth where there is still no water (usually about 0.4-0.5 m), and the part of the building that rises above the ground is covered with thermal insulation (most often it is extruded polystyrene foam) and covered with soil. For drainage, you can organize a sleeve from a layer of crushed stone of at least 0.4 m.
The lid is made double so that water and cold do not pass through it. Brick or concrete edging is laid above the entrance. One of the covers is made of wood and sheathed with polystyrene foam for insulation. The second is made of sheet metal and has locks.
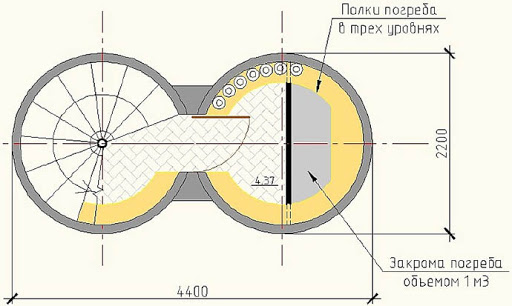
Another option for high water occurrence is a horizontal cellar made of concrete rings. It can be completely above the ground or deepened by 40-50 cm. The foundation is made in the form of a monolithic slab with a reinforcing cage. During installation, the rings are placed on their side. For the back wall, it is better to choose a product with a bottom. Staples are used for connection. The joints are sealed with mortar. After the rings are mounted, backfill is performed. The door is mounted on metal corners or on a timber covered with hydrophobic impregnation. Ordinary brick works well for filling the remaining slots.
DIY construction
Before you start making a cellar of 2 meter rings, you need to choose a place. It is better if the water level is low. You should not start work before purchasing the sections themselves, since the dimensions of the pit are tied to their dimensions, and if the parameters do not match, everything will have to be redone.
Having decided on the design and buying the rings, you can start digging a hole. The removed soil does not need to be thrown away - it will be useful for backfilling.It is better to make a pit of several large dimensions than for rings, so that it is easier to coat them with waterproofing mastic. To control the verticality of the walls and the evenness of the foundation, a plumb line and a building level are used.
In the future, a step-by-step plan for creating a cellar from reinforced concrete rings looks like this:
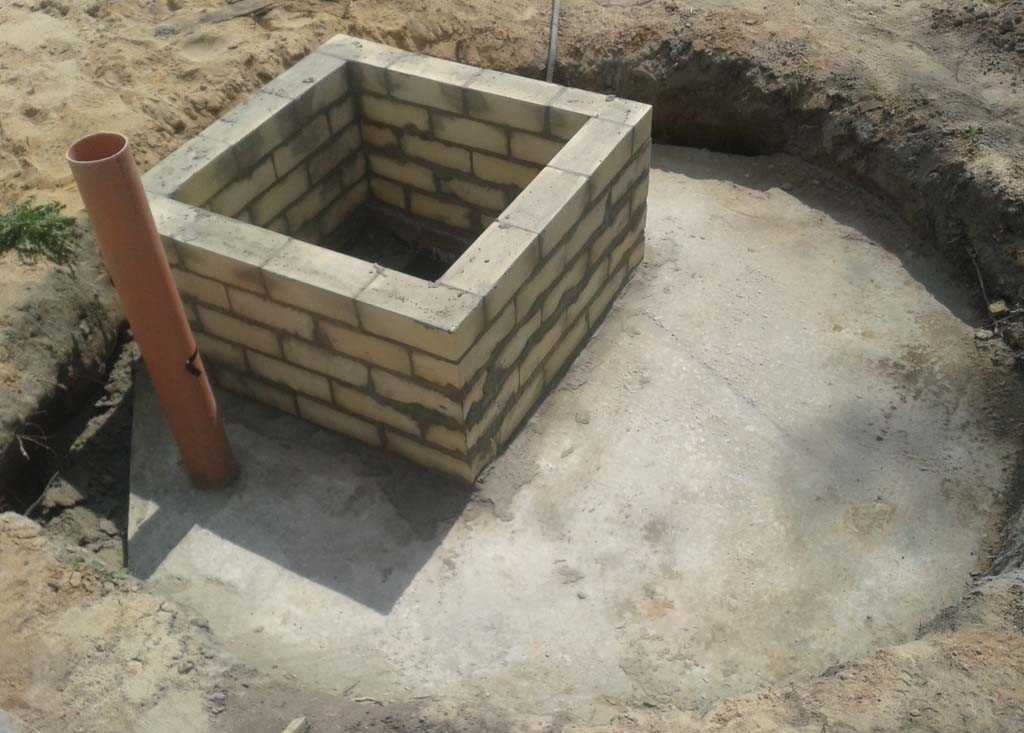
- At the bottom, a cushion of gravel (10 cm thick) is organized and sand is poured on top (5 cm).
- The bottom of the structure is organized. It can be made monolithic right on the spot (like a slab foundation with formwork) or attached to the lower ring with staples (or with a welding machine, if embedded elements are installed in both elements). The least labor-intensive option is to purchase a special ring with a bottom. If a horizontal building is being made, the slab foundation is first prepared, and then the bottom is dealt with.
- Rings are being mounted. Depending on the type of building chosen, they are stacked one on top of the other or joined horizontally. Staples and cement mortar are used for the connection. The latter is also used to seal cracks.
- Waterproofing works are in progress. Outside, it is better to use a combination of special mastic and pasting with 2-3 layers of roofing material. The walls are coated with the composition, then the sheet insulation is mounted. Its surface is also covered with mastic, and another layer of roofing material is created on top. For internal insulation, special impregnations are suitable.
Ventilation is best organized in the form of two pipes extending from opposite walls of the cellar at different heights. One of them is mounted in the lower part of the building (0.5 m from the floor), the other - 0.1 m below the upper edge. If this is not possible, you can limit yourself to one pipe. You cannot completely ignore the ventilation, otherwise the air in the room will be musty.
If you can buy a ready-made hatch cover, you can use this option. But often such products have a hole of insufficient dimensions, to get through which (especially with a load) is problematic. In this case, the cover and floor slab are created independently. One of the options is a reinforced concrete structure with a corner frame and reinforcement from thin (8-10 mm) rods. Pipes for ventilation are led out through it even before the stage of pouring the floor with concrete.


