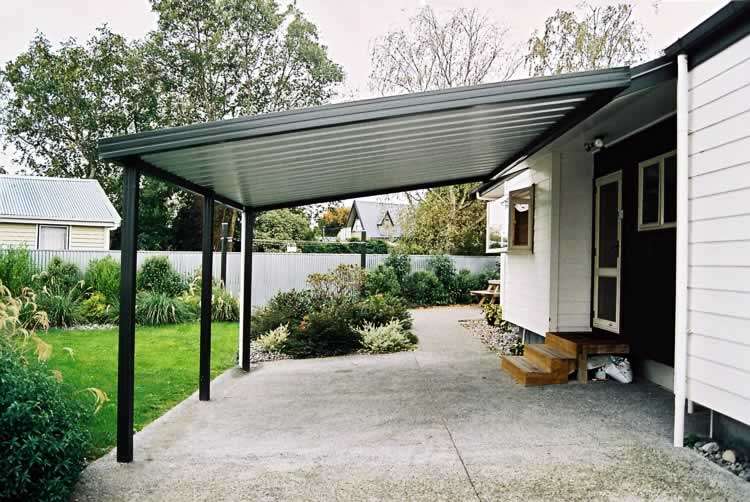
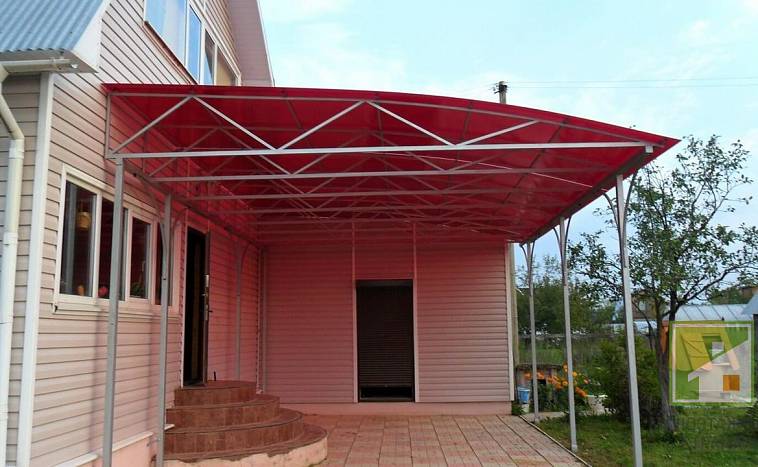
Instead of a veranda or terrace, many of the owners of summer cottages prefer to build a canopy to the house. It is a simple design, less decorative, but as practical as a gazebo. Also, the structure is used to protect the porch, door, balcony or area in front of the building.
- The main functions of a canopy to the house
- Materials for the construction of sheds and their features
- Decking and metal tiles
- Polycarbonate
- Slate
- Sawn timber, board, OSB, plywood
- Metallic profile
- Fasteners
- Materials for work
- The principle of the construction of awnings
- Do-it-yourself canopy production technology
The main functions of a canopy to the house
A canopy is a frame structure lined with any sheet or lath material. The structure is light, simple and decorative. The canopy can have a very different shape: gable, shed, round, rectangular, wavy. With a primitive device, the frame and finishing material can be very attractive.
Functions of a canopy made of wood, polycarbonate or slate:
- Protection from precipitation - rain, snow, hail. Compared to the wall, the door structure is much less resistant to the action of water. The canopy protects it and extends its useful life.
- UV protection - direct sunlight has a detrimental effect on paint, varnish, door material.
- Wind protection.
- Zoning - an extensive canopy over the site, terrace or veranda visually divides the courtyard area into zones.
- Utilitarian function - the area closed from wind, sun and rain is used for parking, warehousing and storage of materials. In the summer, this site can be used as an open repair shop.
- Home garden decoration - some models are exceptionally beautiful and can act as spectacular decorative details.
The size, shape, construction of the visor depends on the dimensions of the entrance group, the style of the building.
Materials for the construction of sheds and their features
A canopy in the country is made of slate, ondulin, plastic, wood. They are chosen based on practicality and attractiveness.
A canopy for a porch or veranda consists of a frame and cladding. The material for the base must have sufficient strength characteristics, so there is less choice here: metal and wood. The cladding must be resistant to water and sun, so there are more options here.
Decking and metal tiles
The simplest option is to use standard and lightweight roofing materials. Since we are talking about an extension, they prefer to take metal sheets, since they are easy to install and weigh little. The most famous ones include profiled sheet and metal tiles.
Profiled sheet - stamped galvanized iron sheet with a thickness of 0.45 to 0.7 mm. The leaf forms a kind of relief - a profile. This is not an aesthetic, but a practical solution: the curves form recesses along which water and snow flow down from the roof. The canopy made of corrugated board is painted with standard enamels, which increases its resistance to corrosion.
An overlap sheet is attached to a canopy to a house or a veranda from a metal profile. The timber frame will not work.
Metal roofing is a close, but more elegant solution. The complex and thoughtful relief creates the impression of a tiled roof. They produce sheets with different thicknesses of zinc layers and different coatings. The paint provides material resistance to ultraviolet radiation.
Installation of metal tiles is easier and more reliable: a special butt mechanism allows the sheets to be laid very accurately.
Polycarbonate
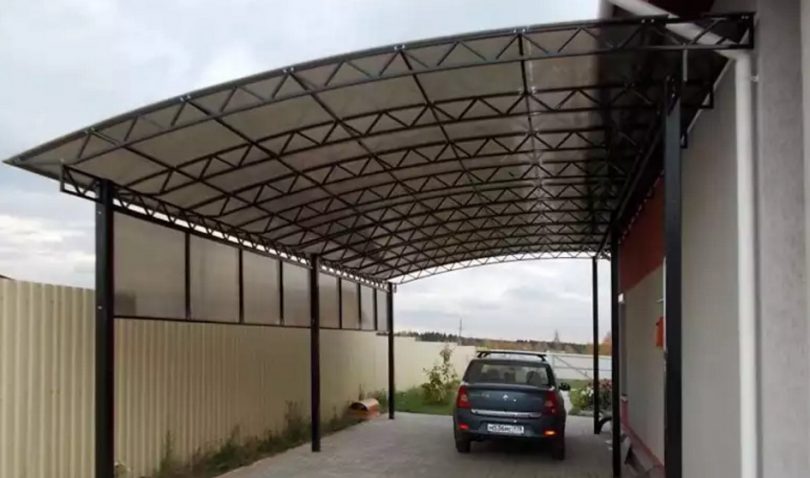
The most effective visor solution. A canopy made of a profile pipe or wood is sheathed with polycarbonate. You can use both a cellular and a monolithic version, but the second is much more durable. Colorless and tinted material is produced.
Polycarbonate is 200 times stronger than glass, not fragile, and reaches a transparency level of up to 98%. Plastic is elastic, so the sheets can be bent at a certain angle, creating visors of a complex ergonomic shape. Since polycarbonate is very light, it is used to make canopies over windows and large structures over open areas.
The canopies made of transparent polycarbonate for summer cottages are unusually effective. Their installation is quite simple, but requires special fasteners.
Slate
Asbestos-cement slate - sheet roofing made of Portland cement with the addition of asbestos. The latter serves as reinforcement, as it creates a fibrous structure.
Slate is hard, heats up slightly under the sun, does not corrode, and is quite durable. The installation is simple - the sheets are overlapped; it is not difficult to replace the damaged sheet. Plus: the material dampens the sound, so the rain does not make a lot of noise.
Disadvantage: extreme external ugliness.
Fiber cement slate includes cellulose fibers, PVA instead of asbestos. In terms of its user characteristics, it does not differ from abssto-cement slate, and in appearance it looks more like a tree.
The profile of the sheets is standard, but the color scheme includes several shades.
Fiber cement slate is considered safer than asbestos cement.
Sawn timber, board, OSB, plywood
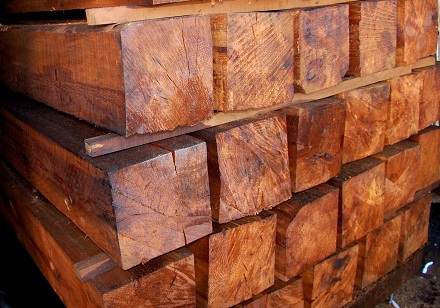
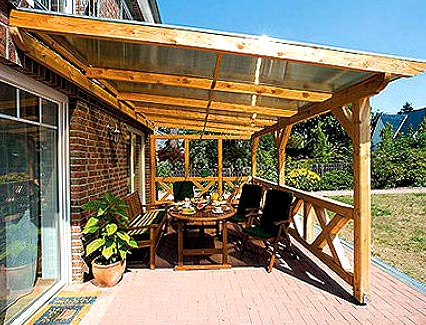
A wooden canopy is a standard option, but very attractive and practical. Wood and any wood materials that can withstand contact with water and snow are used: OSB, plywood. Each of the options has its own characteristics:
- Bar - cut from the trunk, can be profiled, solid, glued. The latter option is insensitive to moisture. The bar awning is heavy, durable and beautiful. From the timber you can make the frame itself and the finish.
- Boards - lumber of lesser thickness. Boards are used only for cladding, the frame can be made of pipes or timber. An unpretentious boardwalk can also be built by a beginner. With some experience, they try to give the boards a more interesting look and configuration.
- Thin trunks, logs, branches, trunk cuts. They are used as part of the frame. Such a canopy has a very complex configuration, requires a lot of time and diligence, but has an absolute uniqueness.
- OSB, plywood - resistant to water, if waterproof glue is used for processing and gluing.
Wood is sensitive to water and high humidity, so wooden canopies must be treated with antiseptics, varnished, and painted.
Metallic profile
It is most convenient to use profile pipes as a frame. Preference is given to products with a square or rectangular cross-section, since it is much easier to attach sheet material to them than round ones.
The section and thickness of the walls are selected taking into account the weight of the cladding. As a rule, the lightest and thinnest pipes are sufficient for the visor.
For a profile pipe, black steel is used. The frame must be painted or coated with a protective varnish to prevent corrosion.
Fasteners
The methods of fastening the canopy elements determine the nature of the material and the dimensions of the structure.
- Welding - a frame made of metal pipes is much easier to weld than with bolts. However, this requires skills in working with a welding machine.
- On bolts - this is how thin pipes are fastened. This is a collapsible design.
- Self-tapping screws - this is how the elements of the wooden frame are held together. The same fasteners are taken to fix the sheet material.
- Special fasteners - thermal washers, required for polycarbonate.
Anchoring is required to install the canopy on a wall.
Materials for work
To build a canopy with your own hands, you will need some tools:
- welding machine - if a metal frame is mounted;
- side saw, hacksaw for woodworking;
- drill or screwdriver for fastening and making holes;
- fasteners - selected based on the nature of the structure;
- pencil, chalk;
- building level, corner, laser level or other measuring tool.
For the canopy, you will need material for the frame - profile pipes or wooden beams, and for cladding - sheets of polycarbonate, tin, slate, boards, glass panels, etc.
The principle of the construction of awnings
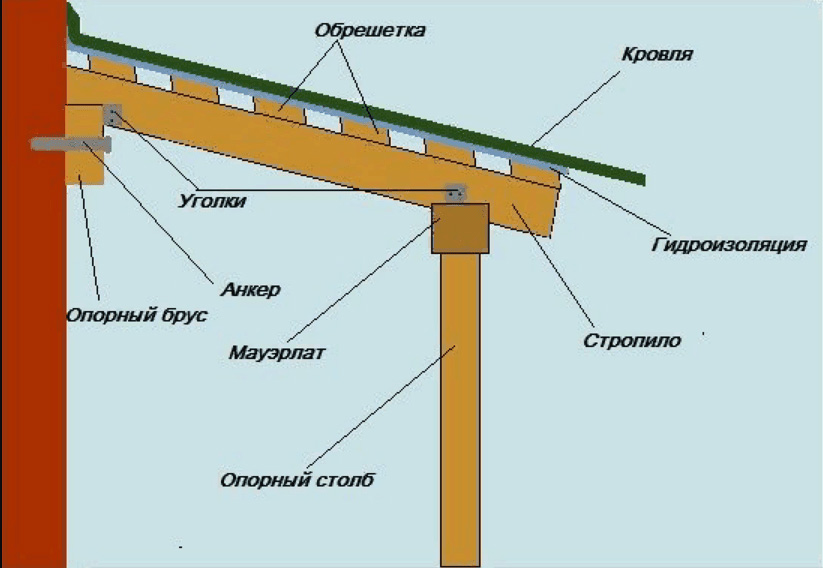
A canopy made of a metal profile or a bar is fixed to the wall with one edge, and rests on the supporting pillars with the other. With small sizes, the visor of the supports may not be available. Fixation is performed by 2 methods:
- The visor is attached to the wall. Not a very good way, since the holes for the fasteners will have to be made in the wall.
- Installation on a support beam - it is screwed to the wall with ordinary or anchor dowels, and the frame is already fixed to the beam. Sometimes it is required to fix vertical posts to the wall.
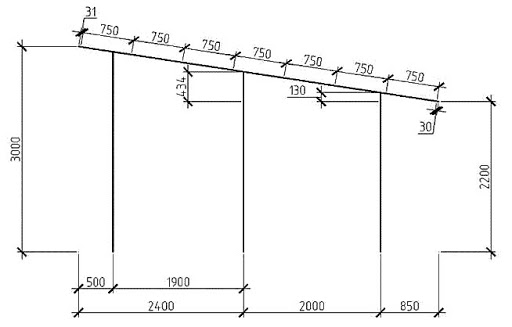
The angle of attachment and the method of fixing depends on the type of canopy. The easiest way is to use a single-slope option. With a complex canopy configuration, it will not be possible to install it on the support beam.
Do-it-yourself canopy production technology
How to build a summer cottage depends on the materials used and the structure of the structure. Previously, wooden canopies were more common. But today, the owners of country houses prefer to attach polycarbonate ones, since parts for such options are produced almost ready for installation.
- Make a construction drawing. If the canopy serves as a canopy, it should protrude on both sides of the entrance by at least 30 cm. If they leave the car here, its dimensions should exceed the dimensions of the car by 30 cm in each direction.
- Choose a design. How to make a lean-to canopy is described in any construction forum. A visor of a more complex shape - a gable, semicircular, must be calculated taking into account the increased load on polycarbonate during bending.
- A frame is made of wood or pipes. The timber is treated with antiseptics or fired, cut to size. The frame is assembled into corners and self-tapping screws according to the scheme. Metal pipes are also cut with a grinder and welded.
- Under the vertical supports, if they are provided, holes are dug, sand and a layer of rubble are laid in them. The depth of the pit is at least 50 cm. A support beam is attached to the wall. The foundation for the awning is not required.
- The frame can be pre-assembled, and then fixed to the beam and installed on the supports. You can weld the structure as it is erected. The support posts are concreted after installation. Construction continues after the concrete has set.
- Sheets of polycarbonate are cut to size with a knife and laid on the ramp. Attached to thermal washers. If the visor has a curved shape, the sheets are pre-bent at the desired angle.
A porch or terrace canopy is a simple and very convenient fixture. The visor protects the door panel from rain, snow and sun, creates shade and coolness for the open veranda.


